Illuminate Your Outdoors: A Comprehensive Guide on How to Install Landscape Lighting
Landscape lighting enhances the beauty and security of your property, transforming your outdoor spaces into inviting and functional areas after dark. Knowing how to install landscape lighting can seem daunting, but with proper planning and execution, it’s a manageable DIY project. This comprehensive guide breaks down the process, providing you with the knowledge and steps to illuminate your landscape effectively and safely.
Planning Your Landscape Lighting Project
Before diving into the installation, meticulous planning is crucial. This phase involves assessing your needs, selecting the right fixtures, and designing the layout.
Assess Your Lighting Needs and Goals
Start by identifying the areas you want to illuminate. Consider:
- Safety and Security: Light pathways, steps, and entrances to prevent accidents and deter intruders.
- Aesthetics: Highlight architectural features, trees, shrubs, and water features to enhance the beauty of your property.
- Functionality: Create usable outdoor spaces for entertaining, dining, or relaxing after dark.
Think about the overall ambiance you want to create. Do you prefer a soft, romantic glow or bright, functional lighting? This will influence your choice of fixtures and their placement.
Choosing the Right Landscape Lighting Fixtures
The market offers a wide variety of landscape lighting fixtures, each designed for specific purposes. Here are some common types:
- Path Lights: Low-level lights that illuminate walkways and driveways.
- Spotlights: Focused beams of light used to highlight specific objects, such as trees or sculptures.
- Floodlights: Wide beams of light used to illuminate large areas, such as walls or gardens.
- Uplights: Lights placed at ground level that shine upwards to highlight trees or architectural features.
- Downlights: Lights mounted overhead that shine downwards to create pools of light.
- Well Lights: Recessed lights installed in the ground, providing subtle illumination.
- String Lights: Decorative lights that can be strung across trees, fences, or patios.
Consider the materials of the fixtures. Common options include:
- Metal: Durable and weather-resistant, but can be more expensive.
- Plastic: Affordable and lightweight, but may not be as durable.
- Composite: A blend of materials that offers a balance of durability and affordability.
Also, think about the type of bulb you want to use. LED bulbs are energy-efficient, long-lasting, and available in a variety of colors and brightness levels. Halogen bulbs are brighter but consume more energy and have a shorter lifespan. [See also: Choosing the Right Landscape Lighting Fixtures]
Designing Your Landscape Lighting Layout
Create a detailed plan of your landscape lighting layout. Sketch your property and mark the locations of the fixtures. Consider the following factors:
- Spacing: Space path lights evenly to provide consistent illumination.
- Aiming: Aim spotlights and floodlights carefully to avoid glare and light pollution.
- Layering: Use multiple types of lights to create depth and interest.
- Balance: Distribute light evenly across the landscape to avoid creating overly bright or dark areas.
Take into account the existing features of your landscape, such as trees, shrubs, and water features. Use lighting to accentuate these features and create a visually appealing design. Think about the viewing angles – how will the lighting look from inside your home, from the street, and from different areas of your yard?
Gathering Your Tools and Materials
Once you have a plan, gather the necessary tools and materials. Here’s a basic checklist:
- Landscape Lighting Fixtures: Purchase the fixtures you selected during the planning phase.
- Low-Voltage Transformer: This converts standard household voltage (120V) to a safe low voltage (12V or 24V) for landscape lighting. Choose a transformer with sufficient wattage capacity for all your fixtures.
- Low-Voltage Wire: Use direct burial-rated wire to connect the transformer to the fixtures. The gauge of the wire will depend on the distance and the wattage of the fixtures.
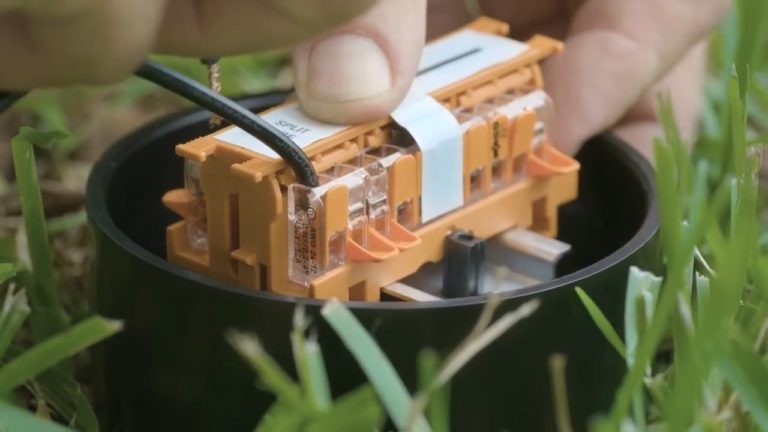
- Wire Connectors: Use waterproof wire connectors to ensure secure and reliable connections.
- Shovel or Trenching Tool: For burying the wire.
- Wire Strippers: For removing the insulation from the wire.
- Screwdrivers: For installing the fixtures.
- Multimeter: For testing the voltage.
- Timer or Photocell: To automatically turn the lights on and off.
- Safety Glasses: To protect your eyes.
- Gloves: To protect your hands.
Installing Your Landscape Lighting System
Now it’s time to install your landscape lighting system. Follow these steps carefully to ensure a safe and successful installation.
Step 1: Install the Transformer
Choose a location for the transformer that is close to an outdoor GFCI outlet and protected from the elements. Mount the transformer on a wall or post, following the manufacturer’s instructions. [See also: Transformer Placement for Landscape Lighting]
Step 2: Run the Low-Voltage Wire
Dig a shallow trench (6-8 inches deep) along the path of the wire. Run the wire from the transformer to each fixture location. Leave some slack in the wire at each location to allow for adjustments.
Step 3: Connect the Fixtures
Connect the fixtures to the wire using waterproof wire connectors. Make sure the connections are secure and properly insulated. Follow the manufacturer’s instructions for each fixture.
Step 4: Bury the Wire
Backfill the trenches and cover the wire with soil. Tamp down the soil to prevent the wire from being exposed.
Step 5: Connect the Transformer
Connect the low-voltage wire to the transformer, following the manufacturer’s instructions. Make sure the connections are secure and properly insulated.
Step 6: Test the System
Plug the transformer into the GFCI outlet and turn on the power. Use a multimeter to check the voltage at each fixture. Make sure the voltage is within the specified range.
Step 7: Adjust the Fixtures
Adjust the aiming of the spotlights and floodlights to achieve the desired effect. Make sure the lights are not shining directly into windows or causing glare.
Step 8: Set the Timer or Photocell
If you are using a timer or photocell, set it to automatically turn the lights on and off at the desired times.
Safety Precautions
Safety is paramount when installing landscape lighting. Always follow these precautions:
- Turn off the power to the GFCI outlet before working on the electrical connections.
- Use waterproof wire connectors to prevent electrical shorts.
- Bury the wire at least 6 inches deep to protect it from damage.
- Wear safety glasses and gloves to protect your eyes and hands.
- If you are not comfortable working with electricity, hire a qualified electrician.
Troubleshooting Common Issues
Even with careful planning and execution, you may encounter some issues during the installation process. Here are some common problems and their solutions:
- Lights not working: Check the transformer, wiring connections, and bulbs. Make sure the transformer is plugged in and the circuit breaker is not tripped.
- Dim lights: Check the voltage at the fixtures. If the voltage is too low, you may need to use a thicker gauge wire or move the transformer closer to the fixtures.
- Flickering lights: Check the wiring connections. Loose connections can cause flickering.
- Lights turning on and off intermittently: Check the timer or photocell settings. The settings may be incorrect, or the timer or photocell may be malfunctioning.
Maintaining Your Landscape Lighting System
Regular maintenance will help to ensure that your landscape lighting system continues to function properly and look its best. Here are some tips:
- Clean the fixtures regularly to remove dirt and debris.
- Replace burned-out bulbs promptly.
- Check the wiring connections periodically to make sure they are secure.
- Trim any vegetation that is blocking the lights.
- Inspect the transformer for any signs of damage.
Conclusion
Installing landscape lighting is a rewarding project that can enhance the beauty, security, and functionality of your property. By following the steps outlined in this guide and taking the necessary safety precautions, you can successfully illuminate your outdoor spaces and create a welcoming and inviting atmosphere. Remember to plan carefully, choose the right fixtures, and maintain your system regularly to enjoy its benefits for years to come. This guide provides a comprehensive overview of how to install landscape lighting, empowering you to take on this project with confidence. The key to successful landscape lighting installation is meticulous planning and careful execution. With these steps, you can transform your outdoor space. Good luck with your landscape lighting project!
