Elevate Your Landscape: The Ultimate Guide to Rock Wall Landscaping
Rock wall landscaping is more than just piling up stones; it’s an art form that blends functionality with natural beauty. Whether you’re aiming to prevent soil erosion, create a stunning visual feature, or add usable space to a sloped yard, a well-designed rock wall can transform your outdoor area. This comprehensive guide will walk you through the essentials of rock wall landscaping, from planning and materials to construction and maintenance. Dive in to discover how to create a breathtaking and durable rock wall that enhances your property’s value and appeal.
Understanding the Basics of Rock Wall Landscaping
Before you start hauling rocks, it’s crucial to understand the fundamental principles of rock wall construction. A successful rock wall isn’t just about aesthetics; it’s about structural integrity and long-term stability. Factors like soil type, drainage, and the weight and size of the rocks all play a vital role.
Types of Rock Walls
There are several types of rock walls, each with its own characteristics and construction methods:
- Dry-Stacked Walls: These walls are built without mortar, relying on the weight and interlocking shape of the rocks to hold them in place. They’re a more natural and permeable option, allowing for better drainage and creating habitats for plants and insects.
- Mortared Walls: Mortar binds the rocks together, creating a stronger and more rigid structure. Mortared walls are often used for retaining walls that need to withstand significant pressure.
- Gabion Walls: These walls consist of wire cages filled with rocks. They’re a cost-effective and versatile option, particularly for large retaining walls or areas prone to erosion.
Planning Your Rock Wall Landscaping Project
Careful planning is essential for a successful rock wall project. Consider these key aspects:
- Purpose: What is the primary function of the wall? Is it purely decorative, or will it serve as a retaining wall? The purpose will influence the design and construction methods.
- Location: Assess the soil type, slope, and drainage of the area. This will help you determine the appropriate type of wall and necessary support structures.
- Size and Shape: Determine the height, length, and overall shape of the wall. Consider how it will integrate with the existing landscape and any surrounding features.
- Materials: Choose rocks that are appropriate for the climate, soil conditions, and aesthetic you desire. Common options include fieldstone, limestone, sandstone, and granite.
- Budget: Rock wall landscaping can range from relatively inexpensive DIY projects to costly professional installations. Set a realistic budget and stick to it.
Choosing the Right Rocks for Your Rock Wall
The type of rock you choose significantly impacts the appearance and durability of your rock wall. Here’s a closer look at some popular options:
- Fieldstone: Naturally weathered stones collected from fields. They offer a rustic and organic look.
- Limestone: A sedimentary rock with a light color and smooth texture. It’s relatively easy to work with and adds a touch of elegance.
- Sandstone: A durable and versatile rock with a variety of colors and textures. It’s a good choice for both dry-stacked and mortared walls.
- Granite: A very hard and durable igneous rock. It’s ideal for retaining walls that need to withstand significant pressure.
- Slate: A fine-grained metamorphic rock that splits easily into thin layers. It’s often used for decorative walls or pathways.
When selecting rocks, consider the following:
- Size and Shape: Choose a variety of sizes and shapes to create a natural and visually appealing look. Larger, flatter rocks are ideal for the base of the wall, while smaller rocks can be used to fill gaps and create texture.
- Color and Texture: Select rocks that complement the surrounding landscape and your overall design aesthetic. Consider the color, texture, and overall appearance of the rocks.
- Durability: Ensure that the rocks are durable and resistant to weathering. Avoid rocks that are prone to crumbling or cracking.
Step-by-Step Guide to Building a Dry-Stacked Rock Wall
Building a dry-stacked rock wall is a rewarding DIY project that can add significant value to your property. Here’s a step-by-step guide to help you get started:
Step 1: Prepare the Site
Clear the area of any vegetation, debris, and loose soil. Excavate a trench along the base of the wall, ensuring that it’s deep enough to accommodate the first layer of rocks. The depth will depend on the size and weight of the rocks, but a minimum of 6 inches is generally recommended.
Step 2: Lay the Foundation
Place the largest and flattest rocks along the bottom of the trench, creating a stable foundation for the wall. Ensure that the rocks are level and tightly packed together. Backfill the trench with gravel to improve drainage.
Step 3: Build the Wall
Begin stacking the rocks, working your way up from the foundation. Choose rocks that fit together snugly, and stagger the joints to create a stronger and more stable structure. Use smaller rocks to fill gaps and create texture. Angle the rocks slightly inward towards the slope to help prevent the wall from collapsing.
Step 4: Backfill as You Go
As you build the wall, backfill behind it with gravel or crushed stone. This will help to improve drainage and prevent water from building up behind the wall, which can cause it to collapse. Compact the backfill as you go to ensure that it’s stable.
Step 5: Cap the Wall
Once the wall is complete, cap it with large, flat rocks. This will help to protect the top of the wall from erosion and create a more finished look.
Tips for Building a Stable and Durable Rock Wall
Here are some additional tips to ensure that your rock wall is stable and durable:
- Use a Batter: Angle the wall slightly inward towards the slope. This will help to distribute the weight of the wall and prevent it from collapsing.
- Choose the Right Rocks: Select rocks that are appropriate for the climate, soil conditions, and overall design aesthetic. Avoid rocks that are prone to crumbling or cracking.
- Ensure Proper Drainage: Proper drainage is essential for the stability of a rock wall. Backfill behind the wall with gravel or crushed stone to improve drainage and prevent water from building up behind the wall.
- Compact the Backfill: Compact the backfill as you go to ensure that it’s stable. This will help to prevent the wall from settling and collapsing.
- Consider a Retaining Wall Expert: For larger or more complex projects, consider consulting with a retaining wall expert. They can provide valuable advice and ensure that the wall is built to code.
Rock Wall Landscaping Ideas and Inspiration
Rock walls are incredibly versatile and can be incorporated into a wide range of landscaping designs. Here are some ideas to inspire you:
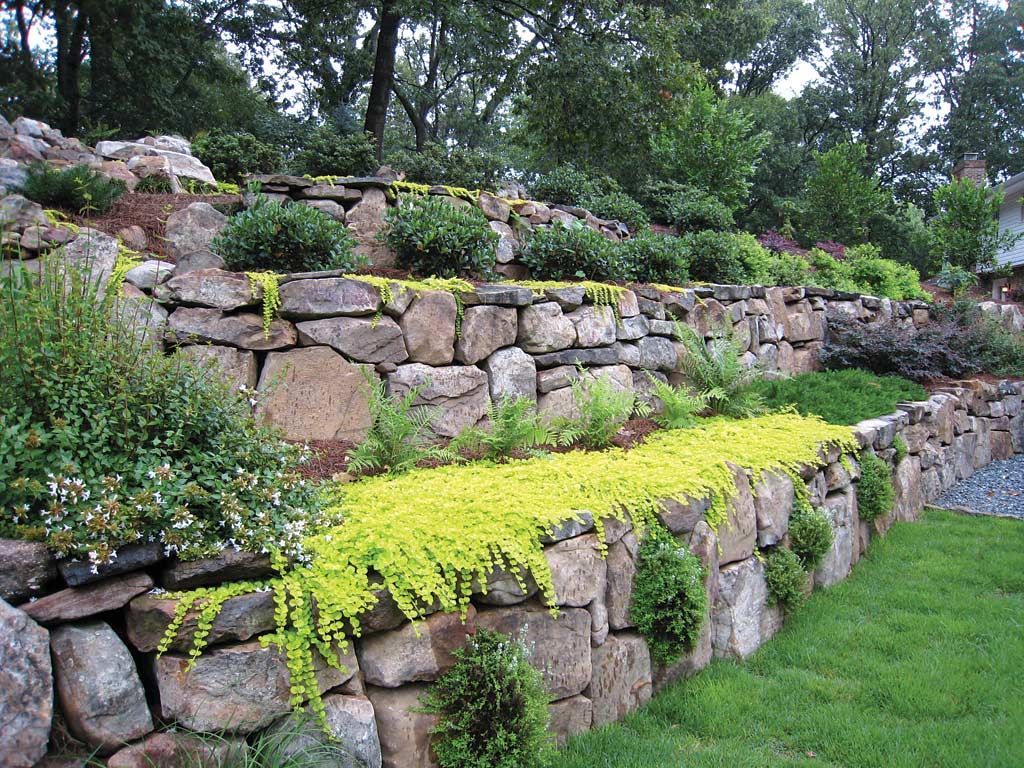
- Retaining Walls: Use rock walls to create terraces on sloped yards, prevent soil erosion, and create usable outdoor spaces.
- Garden Beds: Build raised garden beds using rock walls. This can add visual interest to your garden and make it easier to care for your plants.
- Water Features: Incorporate rock walls into water features, such as waterfalls or ponds. This can create a tranquil and relaxing atmosphere.
- Pathways: Use rock walls to define pathways and create a sense of enclosure.
- Fire Pits: Build a rock wall around a fire pit to create a cozy and inviting outdoor living space.
Maintaining Your Rock Wall Landscaping
Proper maintenance is essential for the longevity of your rock wall. Here are some tips to keep it in top condition:
- Inspect Regularly: Check the wall regularly for signs of damage, such as cracks, loose rocks, or settling.
- Repair Damage Promptly: Repair any damage as soon as possible to prevent it from worsening.
- Remove Vegetation: Remove any vegetation that is growing on or around the wall. This can help to prevent the wall from crumbling and improve its appearance.
- Clean the Wall: Clean the wall periodically with a brush and water to remove dirt and debris.
- Re-point Mortar (if applicable): If you have a mortared wall, re-point the mortar joints as needed to prevent water from seeping into the wall and causing damage.
The Benefits of Rock Wall Landscaping
Investing in rock wall landscaping offers numerous benefits:
- Erosion Control: Rock walls are an effective way to prevent soil erosion, particularly on sloped properties.
- Increased Property Value: A well-designed and constructed rock wall can significantly increase your property’s value.
- Aesthetic Appeal: Rock walls add natural beauty and visual interest to your landscape.
- Usable Space: Retaining walls can create usable outdoor spaces on sloped properties.
- Low Maintenance: Rock walls are relatively low maintenance, requiring minimal upkeep.
- Environmentally Friendly: Rock walls are a sustainable landscaping option, using natural materials and requiring minimal energy to construct.
Hiring a Professional Rock Wall Landscaper
While building a rock wall can be a rewarding DIY project, it’s important to recognize when it’s best to hire a professional. Larger or more complex projects, particularly those involving retaining walls, often require the expertise of a skilled landscaper. A professional can ensure that the wall is built to code, properly engineered, and structurally sound. They can also help you choose the right materials and design a wall that complements your existing landscape. When hiring a professional, be sure to check their credentials, experience, and references.
Cost Considerations for Rock Wall Landscaping
The cost of rock wall landscaping can vary widely depending on several factors, including the size and complexity of the wall, the type of rock used, and whether you hire a professional. Dry-stacked walls are generally less expensive than mortared walls, as they require less labor and materials. The cost of the rock itself will depend on the type of rock and its availability in your area. Hiring a professional landscaper will add to the cost, but it can be a worthwhile investment, especially for larger or more complex projects.
Rock wall landscaping offers a timeless and practical solution for enhancing outdoor spaces. By understanding the different types of walls, choosing the right materials, and following proper construction techniques, you can create a stunning and durable feature that will add value and beauty to your property for years to come. Whether you opt for a DIY project or hire a professional, the key is careful planning, attention to detail, and a commitment to quality craftsmanship. The beauty of a rock wall landscaping project is not just in its immediate visual impact, but also in its long-term contribution to the stability and aesthetics of your outdoor environment. Remember to consider the local climate and soil conditions when selecting materials for your rock wall landscaping to ensure longevity and minimal maintenance. A well-executed rock wall landscaping design can transform an ordinary yard into an extraordinary landscape, blending seamlessly with nature while providing functional benefits. Consider incorporating native plants into your rock wall landscaping to enhance its ecological value and create a more harmonious environment. The versatility of rock wall landscaping allows for endless creative possibilities, from simple garden borders to elaborate terraced landscapes. Don’t underestimate the impact of proper drainage in your rock wall landscaping project; it’s crucial for preventing water damage and ensuring the wall’s stability. By carefully selecting and arranging the rocks, you can create a unique and personalized rock wall landscaping feature that reflects your individual style and preferences. The investment in rock wall landscaping is not just about aesthetics; it’s also about protecting your property from erosion and creating a more sustainable outdoor environment.
[See also: Designing Your Dream Garden]
[See also: Choosing the Right Landscaping Stones]
[See also: DIY Landscaping Projects]
